You wipe the coffee table, leave the room for an hour, and come back to a faint grey film already settling on the wood. Dust is the one cleaning task that never visibly finishes, which is why so many people settle for sweeping it off one surface and letting it land on another. The real question is not whether dust needs to be removed, but which method actually removes it from the room instead of simply relocating it.
The recommended method for cleaning dust from surfaces is well established among professional cleaners and the manufacturers who build their tools: use a dry microfiber cloth or duster first, work from the top of the room downward, and finish with a HEPA-filtered vacuum. That three-part sequence captures dust rather than launching it into the air, and it is the basis for virtually every professional dusting protocol used in homes, offices, schools, and hospitals. This guide explains the reasoning behind each step, what to do on different types of surfaces, and how to choose and maintain the right tools so the method works quickly and consistently.
Why the Dusting Method Matters More Than You Think
Before getting into the steps, it is worth understanding why the recommended method looks the way it does. Dust is not a single substance. It is a mixture of shed skin cells, fabric fibres, pollen, mineral particles, pet dander, insect fragments, and fine particulate matter that drifts in from outdoors. Because these particles have very different sizes and electrostatic properties, they behave in predictable ways: they settle on horizontal surfaces, cling to vertical surfaces through static charge, and become airborne again as soon as they are disturbed.
This is why the tool and technique matter. A feather duster or a dry cotton rag tends to push dust across a surface and flick it into the air. Some of that dust lands on nearby surfaces, and the rest hangs in the breathing zone where it can be inhaled. Over time, airborne dust settles again, which is why a room dusted with the wrong technique looks dusty again so quickly. The recommended method prioritises capture over displacement. Microfiber holds dust in its structure, and a HEPA vacuum removes the dust that falls to the floor, so very little is left to resettle.
There is also a surface protection argument for doing it correctly. Many dust particles are abrasive. Sand and mineral dust, in particular, are made of hard-edged particles that can leave fine scratches on polished wood, lacquered furniture, and display screens when they are rubbed around with a loose cloth. A microfiber cloth traps those particles inside the fibre structure, so the surface is wiped with clean fabric rather than dragged through gritty dust. For anyone who has ever seen a glossy table develop a faint haze over years of careless dusting, this is the difference between cleaning and grinding.
The Recommended Method at a Glance
If you only remember one part of this guide, remember this: dust from the top down, dry first, and vacuum last. The order is not a stylistic preference. It exists because gravity is the most predictable force in every room. Dust dislodged from a high shelf will fall onto the table below. Dust brushed off a table will settle on the floor. If you dust the floor first and then work on the furniture, you either have to vacuum again or accept that you have re-contaminated the floor with fresh dust.
- Clear the space. Move ornaments, lamps, and loose items off the surfaces you plan to dust, or use your off-hand to lift them while you wipe underneath.
- Dust overhead surfaces first. Ceiling corners, light fixtures, ceiling fans, door frames, and shelf tops are the highest dust reservoirs in a room.
- Work down the walls and furniture. Clean picture frames, wall sconces, window treatments, and the tops of tall furniture before moving to tables, desks, and counters.
- Dust the lower levels last. Baseboards, chair rails, the lower third of doors, and low shelves collect the dust that has already fallen once.
- Vacuum the floor with a HEPA-filtered vacuum. This captures the dust that fell during dusting instead of leaving it to be walked around the room.
This sequence should feel familiar to anyone who has watched a professional cleaning team work a room. The professional version adds two refinements that matter over time. First, the dry step always comes before any damp step on the same surface, because dry microfiber lifts loose particles and damp microfiber picks up what remains. Second, vacuuming is not optional at the end; it is the step that makes the rest of the work last longer.
Why Microfiber Is the Backbone of the Recommended Method
Microfiber is the standard tool in professional dusting for reasons that go beyond marketing. The term refers to fibres that are far finer than cotton or wool, typically a blend of polyester and polyamide that is split during manufacturing to create wedge-shaped filaments. These split filaments are small enough to fit into microscopic gaps on a surface, and their shape produces two useful effects: electrostatic attraction and capillary action.
Split Fibres, Static Charge, and Tiny Channels
Electrostatic attraction matters because much of the dust in a home carries a static charge. When a dry microfiber cloth moves across a surface, the friction generates a weak electrostatic field that attracts oppositely charged dust particles toward the cloth. This is why a dry microfiber cloth can pick up dust from a polished surface without liquid or cleaner. Capillary action matters because the split filaments create tiny channels that draw moisture and grease into the cloth. A lightly dampened microfiber cloth therefore lifts sticky residue, coffee stains, grease film, and the dull haze that plain water cannot break.
The fibre density is another factor. A high-quality microfiber cloth contains hundreds of thousands of filaments per square inch. Each filament acts like a microscopic hook that traps a particle, and the sheer number of hooks means dust is held inside the fabric rather than pushed ahead of it. Cotton and paper towels, by contrast, have relatively coarse fibres that push dust along the surface. That is why a cotton rag tends to leave a thin streak of dust at the far edge of a shelf, while microfiber leaves the edge clean.
Professional-Grade Microfiber Is Different from Basic Microfiber
Not all microfiber is equal, and this is where buying decisions matter. Professional-grade dusting cloths are usually split microfiber with a gram weight of roughly 250 to 350 grams per square metre; lighter cloths work for screens and glass but lack the pile needed to pick up heavy dust. Blended edge construction also matters because cloths with a hemmed or laser-cut edge do not shed fibres as they are wiped. A good all-purpose microfiber cloth should be washable many times without becoming oily or scratchy, and it should be safe for use on wood, glass, stainless steel, and painted surfaces.
For households that want a single answer to the question of what to use, the answer is a dry, split-microfiber cloth at that level of quality. It is the same tool that commercial cleaning teams use by default, and it has been proven across decades in real facilities rather than in product descriptions alone. One of the most useful overviews of why microfiber outperforms nearly every alternative can be found in this guide to microfiber cleaning cloths, which goes into more detail on absorbency, fabric care, and everyday applications.
Dry Dusting Surface by Surface
The recommended method stays the same from room to room, but the amount of pressure, the tightness of the fold, and the decision to dust dry or slightly damp depend on the surface. The table below summarises the standard professional approach to the surfaces most commonly covered in dust.
Recommended dry dusting techniques for common household surfaces
| Surface |
Tool and condition |
Technique |
Notes |
| Polished and lacquered wood |
Dry split-microfiber cloth, folded into a pad |
Light pressure, straight line or small circular motion, from the centre toward the edges |
Avoid silicone polishes on a regular basis; they build up a film that attracts more dust |
| TV, monitor, and laptop screens |
Dry ultrafine microfiber cloth designated for screens |
Side-to-side strokes without pressure; never spray liquid directly onto the screen |
If a spot needs moisture, dampen the cloth with water and wipe once |
| Window blinds |
Microfiber duster head or cloth wrapped around a kitchen tong |
Grip each slat between the cloth surfaces and pull from one end to the other |
Deep cleaning of blinds is rarely necessary if this is done monthly |
| Painted walls and wallpaper |
Dry microfiber duster with a long handle |
Light vertical or horizontal strokes, starting at the top of the wall |
Test an inconspicuous corner before wiping eggshell or matte paint |
| Laminate and sealed stone countertops |
Dry microfiber cloth, or slightly damp for sticky spots |
Broad overlapping swipes; no circular rubbing for sticky residue |
Dust before damp cleaning so grit does not scratch the sealant |
| Leather furniture |
Dry microfiber cloth only |
Gentle wiping in the direction of the grain |
Do not use furniture polish on leather unless the manufacturer states it is safe |
| Houseplants and lampshades |
Dusting brush attachment on a vacuum, or a dry mini duster |
Brush lightly from the base outward, or vacuum the shade using a soft-bristle brush |
Paper and fabric shades are easily crushed by hand pressure |
One practical detail appears again and again in professional dusting: fold the cloth, do not crumple it. A folded microfiber cloth gives you eight clean sides. As one side becomes loaded with dust, refold to a fresh side. This keeps the dust off the surface even when the cloth is heavily soiled, and it extends the time between trips to the sink. The moment all sides are loaded, switch to a clean cloth or shake it out outside before continuing.
For electronics, it is also worth remembering that dust is often carried by static charge. A dry microfiber cloth is the safest first response because it does not spray aerosolised particles into the air or leave moisture in ports. If you use a screen cleaning product, mist the cloth rather than the screen, and give the cloth a moment to distribute the moisture evenly.
The Top-to-Bottom Sequence in Practice
Understanding why top-to-bottom works is easier than remembering it when you are rushing. The simplest way to keep the order correct is to mentally divide the room into three vertical bands: everything above eye level, everything between eye level and knee level, and everything at or below knee level. Finish each band before moving to the next one.
The Highest Band
The highest band includes ceiling corners, crown molding, ceiling light shades, ceiling fans, the tops of cabinets, and the tops of tall bookcases. These are the places where dust accumulates undisturbed for weeks and releases large flakes and cobweb-like clumps when finally touched. Start there, because anything that falls will be dealt with later by the lower bands.
The Middle Band
The middle band is where the most visible dust collects: picture frames, shelves, tabletops, desks, window sills, chair arms, and horizontal decorative objects. After the overhead band is done, the middle band is what most people see when they glance around a room. Dusting it second means the dust that falls from above arrives on surfaces you have not cleaned yet, so nothing has to be wiped twice.
The Lower Band
The lower band covers baseboards, door edges, the lower panels of cabinets, skirtings, and the floor itself. Baseboards are frequently forgotten, and they accumulate a surprising amount of fine grey dust after only a few vacuuming passes. Complete this band after the furniture is done, and finish the sequence by vacuuming the floor so that the dust from all three bands is removed from the room rather than redistributed by footsteps.
Finish with a HEPA Vacuum
Vacuuming last is the step that separates a good dusting session from a great one. When you dust a high shelf, a percentage of the dust becomes airborne and eventually settles on the floor. If the floor is vacuumed after dusting, that freshly fallen dust is removed in the same session. If the floor is vacuumed first, the dust from the shelf lands on a clean floor and stays there until someone walks on it, at which point it becomes airborne again.
The HEPA requirement is not a marketing detail. A true HEPA filter captures the vast majority of particles down to a fraction of a micron, including fine dust, pollen, pet dander, and the microscopic mineral particles that ordinary vacuum filters simply blow back out through the exhaust. A vacuum with a poor filter is one of the biggest hidden contributors to dust in a home, because it sprays fine particles across the room at high speed while appearing to clean the floor.
When vacuuming after dusting, use a floor nozzle appropriate for the flooring type. On hard floors, a hard-floor setting or a bare-floor nozzle prevents the brush roll from scattering dust. On carpet, go over high-traffic areas twice in opposite directions. Pay attention to the edges of the room and to baseboard crevices, where dust tends to drift after it falls from walls and shelves. A crevice tool attached to the vacuum is the single best way to clean the groove between the baseboard and the floor without bending down with a cloth.
The filter itself also needs maintenance. Wash or replace vacuum filters according to the manufacturer's schedule, and check the brush roll for hair and thread at least once a month. A vacuum with a clogged filter loses suction quickly, and a vacuum with reduced suction leaves fine dust behind no matter how carefully you guide the nozzle.
Damp Dusting and When to Use It
The recommended method is dry first, but dry alone cannot handle everything. Grease, sticky fingerprints, dried spills, and cloudy residue require a damp step. The word damp is important: a cloth should be wetted, then wrung so thoroughly that it feels moist rather than wet. A saturated cloth leaves a film of water that can streak wood, spot stainless steel, and damage unfinished surfaces. A damp microfiber cloth, on the other hand, adds capillary action to the electrostatic attraction of the fibres, and it lifts residue without leaving enough moisture to cause harm.
Damp dusting is most useful in kitchens, bathrooms, and rooms where cooking vapours or humidity combine with dust to form a film. Kitchen cabinet tops, range hoods, bathroom vanity tops, and window ledges often need a damp pass after the dry pass. The same cloth, rinsed and wrung out again, can be used for the final rinse. In practice, many professional cleaners alternate a dry microfiber cloth and a damp microfiber cloth on the same surface only when the dry cloth has already removed the loose dust.
There is also a role for spray-on dusting products, but they should be used sparingly. Silicone-based polishes leave an electrostatic film that attracts dust. Water-based spray cleaners are a safer choice, and for most hard surfaces plain water on a microfiber cloth is enough. If a product is used, spray it onto the cloth rather than the surface, so that overspray does not settle on nearby items that have already been dusted.
High Dusting: Ceilings, Fans, and Light Fixtures
High dusting is the part of the recommended method that most people skip, and the consequence is visible: dusty fan blades, cobwebs in corners, and a thin film on the top edge of door frames. The tool that makes high dusting practical is an extendable duster with a microfiber head. A telescoping handle lets you reach an eight-foot ceiling from the floor, but the head design matters just as much. A good high-dusting head is flexible enough to conform to curved surfaces and soft enough to avoid scratching finish.
Ceiling fans deserve special mention because they are both high and horizontal. The most efficient way to dust a fan blade is to reach over the back edge with the duster and pull it toward you, so that the dust falls forward into the room rather than onto your face. The same technique works for air conditioner vents and ceiling light shades. Let the dust fall; the final vacuum step is what removes it.
For decorative items that are too fragile to wipe directly, a vacuum with a dusting brush attachment is a better choice than a duster. Figurines with small details, pleated lampshades, silk flowers, and lamp shade linings can all be vacuumed without being knocked or bent. The brush attachment lifts the dust into the airstream instead of pushing it deeper into the crevices.
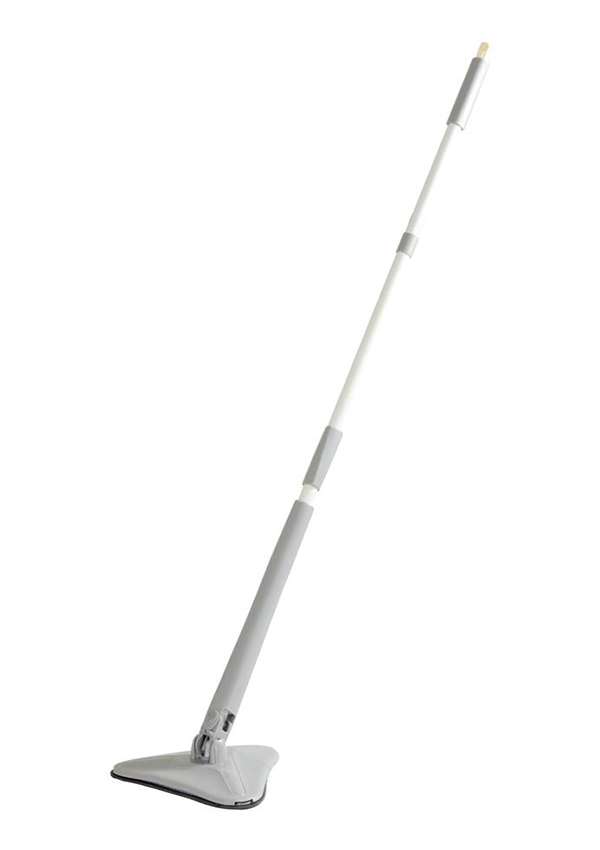
One of the most convenient options for high dusting is a refillable dusting wand whose head can be removed, washed, and replaced. A folding magic duster is a typical example of this design: the microfiber head folds to reach narrow gaps and pivots to cover flat planes, and when the head becomes saturated it can be washed or replaced without replacing the whole tool. Keeping one of these in a utility closet means high surfaces no longer require a ladder every time.
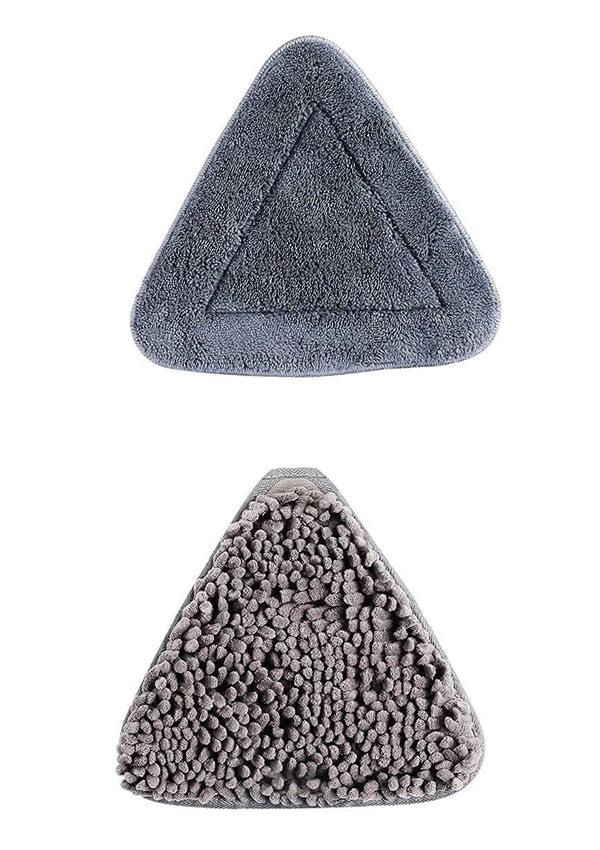 Folding Magic Duster with Washable Triangular HeadThis folding duster adjusts to corners and narrow gaps, with soft fibers that trap dust without scattering it. Its washable head makes it a practical tool for regular high dusting before other cleaning.View Product →
Whatever tool you use, high dusting should happen before any other dusting in the room, and it should happen on a regular schedule rather than when visible cobwebs appear. A large share of airborne dust actually settles upward first: warm air carries fine dust toward the ceiling, where it clings to surfaces in a thin film. By the time you can see it on a fan blade, it has been redistributing itself around the room for weeks.
Choosing Tools That Follow the Recommended Method
The market is full of dusting tools that look different but perform the same basic task. The recommended method narrows the choice down to a few categories that are easy to maintain and effective in a real room.
Four Tool Categories Worth Owning
- All-purpose microfiber cloths. These are the foundation. Look for split microfiber, a gram weight of 250 to 350 GSM for general dusting, and a hemmed or laser-sealed edge. Buy at least six so you can rotate them during a full-house dusting session.
- Microfiber dusters with washable heads. A hand-held duster for shelves, electronics, and decorative objects should have a pile that holds dust electrostatically rather than a feather-like surface that flicks it around. Washable heads save money and reduce waste.
- Extendable dusters for high surfaces. A telescoping handle with a pivoting microfiber head covers the top-to-bottom sequence without a ladder. Refill heads are a useful feature because the head is the part that wears out. An overview of how these tools work can be found in our explanation of cleaning dusters.
- Vacuum attachments. A dusting brush, a crevice tool, and a hard-floor nozzle turn an ordinary vacuum into a dust-management system. They are not optional extras if you want to follow the recommended method completely.
Households that switch to a dusting system based on these four categories usually find that dusting takes less time, not more. The reason is that each tool is designed for a specific phase of the method, so there is no time wasted on improvising with rags, damp paper towels, and feather dusters that leave a trail of dust behind them.
Two Tools That Earn Their Place
For most rooms, a single high-quality duster design can cover both high surfaces and delicate ones. A multifunctional dusting duster with a shapeable head is useful for this purpose, because it can be angled into corners, flattened for tabletops, and used on shades and frames without scratching them.
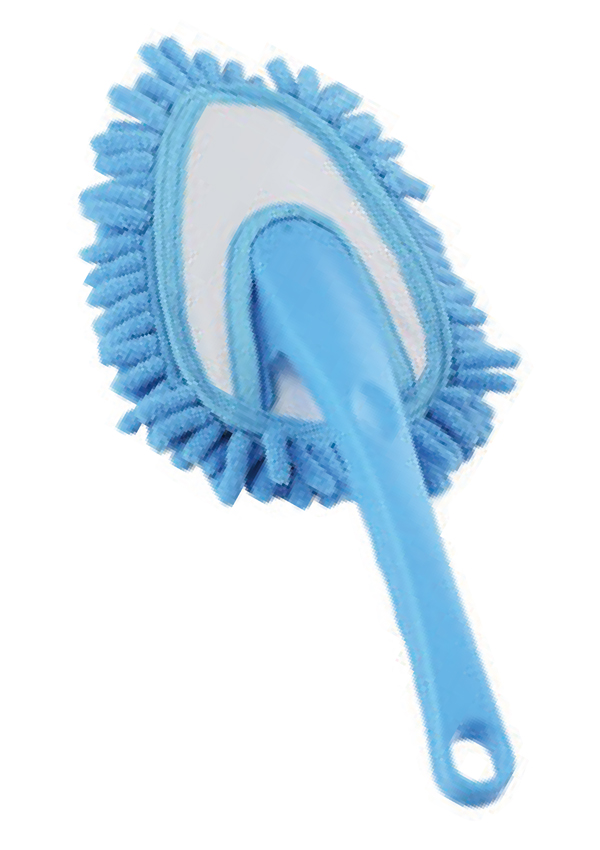 Multi-Functional Dusting Duster with Adjustable HandlesThis duster offers short and long handles for detailed and high-reaching tasks. Its chenille or coral fleece heads use static adsorption to capture fine particles, suiting delicate surfaces and allergy-conscious homes.View Product →
Equally important is the cloth used for final wiping. A dedicated household cleaning towel made from split microfiber gives the same dust-trapping performance as a professional cloth and can be washed dozens of times before it needs to be replaced. Dedicate one colour to general dusting and another to glass and screens so that the glass cloth never picks up grit from furniture dust.
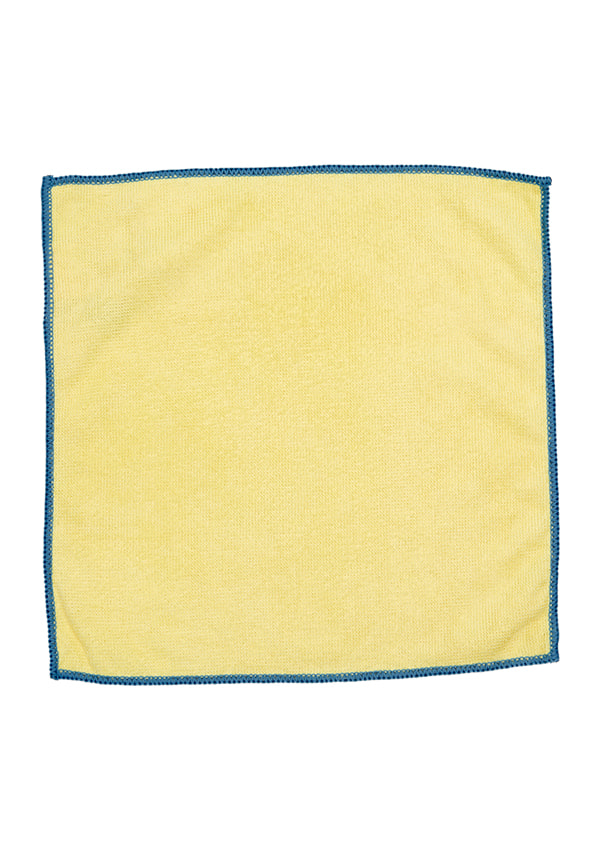 Split Microfiber Household Cleaning Towel for DustingThis towel traps dust effectively and can be washed dozens of times. Using separate colors for general dusting and glass prevents grit transfer, while avoiding fabric softener preserves its electrostatic cleaning power.View Product →
Caring for Microfiber Dusters and Cloths
Microfiber does not lose its dust-trapping ability quickly, but it can be ruined by improper care. The most common mistake is washing microfiber with fabric softener. Fabric softener coats the split filaments with a waxy layer that eliminates the electrostatic charge and reduces the capillary channels, turning a professional-grade cloth into a rag that merely pushes dust around. Dryer sheets do the same thing. If you want microfiber to keep working, skip both.
The correct care routine is simple. Wash microfiber cloths and duster heads separately from lint-producing fabrics such as cotton towels and flannel. Use warm water and a small amount of liquid detergent without bleach or fabric softener. Air-dry them, or tumble dry on a low-heat setting without dryer sheets. When the cloth begins to feel smooth instead of grippy, or when it stops picking up dust, it is time to replace it. In normal home use, a quality cloth should last for months of weekly dusting before reaching this point.
Duster heads with refillable designs should be emptied or washed after each use if they are heavily loaded. Some heads can be vacuumed with the brush attachment to renew them between washes. Store dusters with the head up so no dust is pressed back into the pile. This simple maintenance keeps the tool effective and prevents the build-up that makes old dusters start to smell.
How Often Should You Dust?
There is no single recommended frequency for dusting because homes differ in dust load, occupant sensitivity, and air filtration. The question to ask is not how often you should dust but how quickly visible dust returns. That interval is your personal schedule guide.
As a starting point, the rooms used most often deserve attention once a week. This includes the living room, the kitchen, and the home office, where surfaces are touched constantly and dust is stirred up by movement. Bedrooms can often go for two weeks between full dusting sessions, but a quick wipe of the nightstand and dresser tops once a week makes the full session shorter. Rooms that are closed most of the time, such as guest rooms and storage rooms, can be dusted monthly.
High dusting follows a different rhythm. Ceiling corners, fans, and light fixtures accumulate dust slowly but noticeably. A monthly high dusting pass is reasonable in most homes. If you live on a busy road, near a construction site, or in a region with high pollen counts, shorten the interval. The same advice applies if anyone in the household has allergies or asthma, because the relationship between surface dust and airborne dust is direct: the less dust on surfaces, the less dust available to become airborne.
Common Dusting Mistakes to Avoid
Even with the right tools, it is easy to fall back into habits that defeat the method. The following mistakes are the ones professional cleaners see most often when they work in homes that already own the right equipment.
- Dusting with a feather duster or a wool duster that is never cleaned. These tools redistribute dust rather than trapping it, and the dust trapped in the tool is released again on the next use.
- Using a wet cloth on dry dust. A wet cloth pushes dry dust into a muddy smear, especially on wood and laminated surfaces. The dry step must come first.
- Dusting from the bottom up. This guarantees that dust from the top of the room lands on surfaces that have already been cleaned.
- Forgetting light fixtures and ceiling fans. These are the biggest dust reservoirs in a room, and they shed dust onto everything below when they are turned on.
- Vacuuming floors before dusting furniture. The floor should always be the last horizontal surface in the room.
- Leaving dust on the vacuum brush roll. A clogged brush roll loses suction and scatters debris instead of lifting it.
- Rubbing screens and electronics with a rough cloth. Screens are easily scratched by dust particles that are ground into the surface; a dry ultrafine cloth with no pressure is the only safe option.
- Using multi-surface spray on wood. Many dusting sprays leave a silicone layer that attracts dust, defeats the electrostatic property of microfiber, and creates a greasy surface over time.
The theme behind all these mistakes is the same: dusting is a removal process, not a displacement process. Any tool or technique that moves dust from one surface to another is merely postponing the work. The method described in this guide removes dust from the room entirely, which is why it produces a result that lasts longer and looks cleaner.
A Professional-Grade Dusting Protocol
The following protocol brings everything into a single sequence that a professional cleaner can execute in about twenty minutes for an average bedroom or home office, without rushing the high dusting. Adjust the time for larger rooms or heavily furnished spaces.
Summary of the recommended dust cleaning protocol by room segment
| Step |
Area |
Tool |
Purpose |
| 1 |
Clutter removal |
Hands, tray, or basket |
Expose the surfaces so dusting tools reach full contact |
| 2 |
Ceiling edges and light fixtures |
Extendable microfiber duster |
Remove the highest dust reservoir before anything else |
| 3 |
Ceiling fan blades |
Extendable duster or damp cloth on a handle |
Prevent fan operation from redistributing dust |
| 4 |
Walls, picture frames, and doors |
Duster or dry microfiber cloth |
Clear vertical dust that slides down onto furniture later |
| 5 |
Furniture tops and shelves |
Dry microfiber cloth, folded |
Capture dust from the largest horizontal area |
| 6 |
Electronics and screens |
Ultrafine dry microfiber cloth |
Remove static dust without scratching |
| 7 |
Damp follow-up on sticky or greasy spots |
Damp microfiber cloth |
Lift residue that dry dusting cannot remove |
| 8 |
Baseboards and door edges |
Microfiber cloth or vacuum crevice tool |
Finish the lower band |
| 9 |
Floor vacuuming |
HEPA-filtered vacuum with appropriate nozzle |
Remove all dust that fell during the session |
| 10 |
Tool maintenance |
Shake out or vacuum duster heads, set cloths aside for washing |
Keep the tools effective for the next session |
Step ten is the one most people skip, and it is the step that determines how well the method works the next time. A duster that is not emptied simply pushes previously collected dust back onto surfaces. A cloth that is not washed becomes a carrier of grit rather than a dust trap. The recommended method is a closed loop: clean tools collect dust, dirty tools redistribute it.
The recommended method for cleaning dust from surfaces is not a secret recipe. It is the collective experience of professional cleaners, equipment manufacturers, and the facilities that have used these techniques for decades. Dry microfiber first, top-to-bottom order, HEPA vacuum last, and a few well-chosen tools that are cleaned after each use. Each step is simple on its own; together they form a system that keeps surfaces dust-free for longer, protects finishes from abrasive wear, and reduces the amount of dust floating in the air you breathe.
The tools do not need to be expensive or complicated. What matters is that they follow the same principles: trapping dust rather than flicking it, reaching high surfaces so dust does not accumulate overhead, and capturing the fallout on the floor. Once those principles are in place, keeping a home dust-free becomes a matter of routine rather than a recurring battle.